
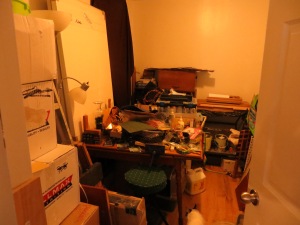
When we last left off I’d shared this scary photo of my work room. Thankfully it is a room transformed!

Step number one for my little work room was to reorganise the flow, I felt I was barricaded with the table in it’s previous orientation, and this layout felt SO much better!

The previous chaotic state of my work room had me looking for a LARGE storage unit for some leftover boxes, paints, and tools. I scored this wardrobe second hand for $100

In this room I am determined not to install anything permanently because I will most likely have to move my tools out and re-purpose the room, so free standing furniture helped sort out my storage needs.

On the other side I have a scroll saw set up on top of a cabinet that I’d saved from a curb a while back.

I decided to put most of my precious tools in this drawer. Out of sight but easy to access

This table is serving as my bench, it has splayed legs witch helps a little but I may need to anchor it somehow because it travels when I plane boards. I may just try rubber cups under the feet.

Here are the contents of that tool chest atop my bench. Note the hand embroidered super man swatch of cloth top right- somehow this makes it into my home tool area everytime. I made the thing in high school and darn it if it doesn’t make me feel super.
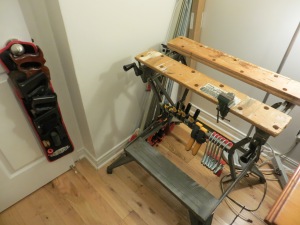
I have this workmate to help clamp up workpieces. I had to spend a good couple of hours fixing one of the vise screws (perhaps I’ll post the kludge)

And most recently I decided to paint the walls because I couldn’t stand the blue tinged white- hardly welcoming. And this is my home after all!

This room actually faces a window directly opposite and I feel a bit odd opening the blinds, so I put up privacy film so that I could still enjoy the meagre daylight that this room receives.

Here is my little work room after painting the walls a buttery colour. I’m glad I finally have a room to work in- and it sure took longer to organise that I thought!
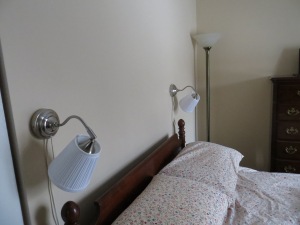
But wait there’s more! After/during sorting my room, a couple of projects presented themselves. The lack of room for a bedside table on one side of the bed led to building a shelf for the spot between the two sconces pictured above.

I found some small boards well suited to the job and roughly jointed the mating edges. I was going for a rustic look and so I wasn’t concerned with planing the faces. I try to remember that before I became a woodworker I thought gaps in joints were more authentic looking, and tool marks added character- something that we are taught to avoid at all costs as woodworkers!

Here’s the shelf in place- finally a place to put a water glass!
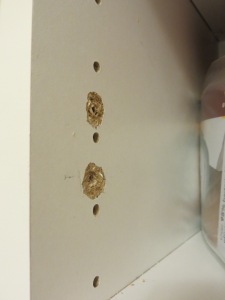
Project number two was to reinforce my bathroom wall cabinet’s hinges. The particle board was failing, and the doors were in danger of falling off.
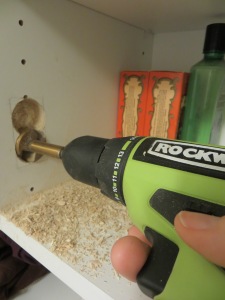
I removed material so that I could glue in solid wood blocks.

Once the glue set up I put my hinges and doors back up and revelled in the result.

Also- I installed two “cat shelves”! It’s a thing! Who knew this would make cats happy. They also help give a leg up to higher surfaces. I took pity on my cats when I found them cowering atop my bedroom dresser when my nephew and neice visited during the holidays.
That wraps up what I’ve been up to during the last month or more. I hope to get some REAL woodworking going now that my work room is ready. Happy new year and happy woodworking to all!

Leave a comment